Research
Ever since I watched the Loki TV series, I've wanted to build a prop replica of the TVA Time Reset Charge. It was interesting because it would look cool sitting on a shelf but could also offer a utilitarian function as a lamp or something on my desk. I've also wanted to try 3D printing and this seems like a relatively small (in size) Projects that would be a good starting point.
To begin, I tried to capture a number of screen shots from the TV series to use as reference.
As you can see however, these are not great. They offer a wide variety of views but not great detail. I could make some rough guesses but not something that would be accurate enough for my liking. I tried messaging the prop departments for the shows and individual creators of marvel props with no luck so I shelved the idea.
While reading something about the show a few weeks ago, I discovered that Disney's Avengers Campus in California had the prop on display at some point this past summer. This was great news. I scavenged the #AvengersCampus and #Loki / #TVA has tags on Instagram and Twitter and was able to discover that the display next to the Terran Treats booth in the Collectors are of the Guardian of the Galaxy ride was where they were. Looking further, I was able to find a few people who had taken photos of the props while eating their Terran Treats and got this:

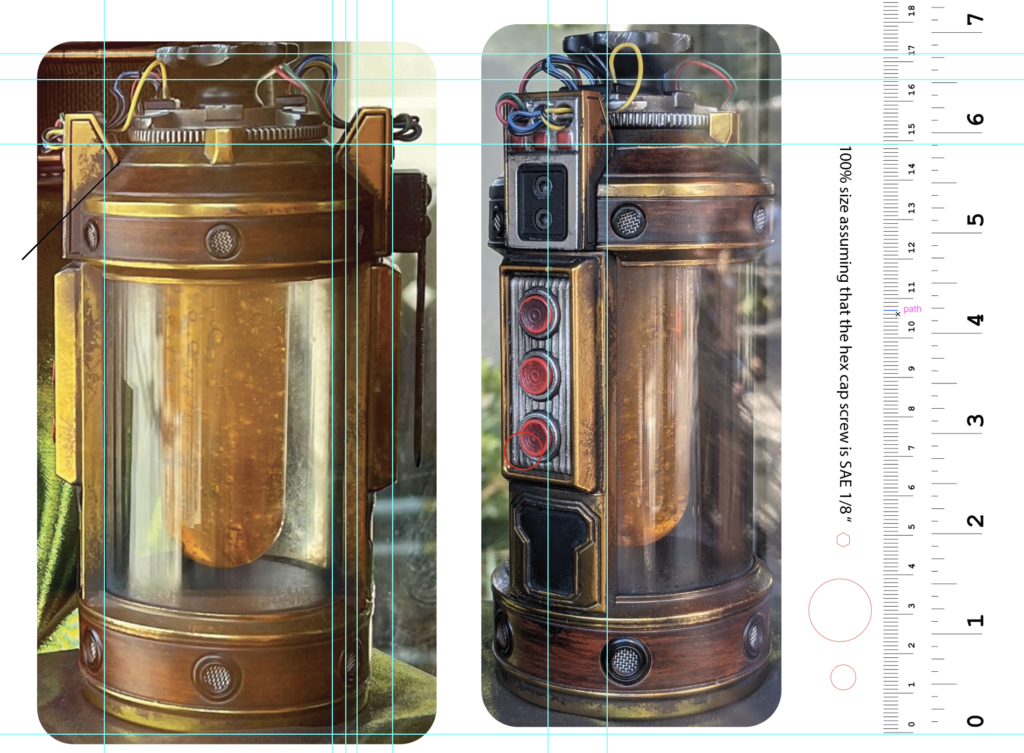
Perfect! Now I had something detailed enough to build form.
To get the proper scale of the object I made a few educated guesses based on:
- the size of the wire mesh in the holes
- the size of the hex bolt on the side
- the gauges of the wire
- the general size of the prop from the charters handling it in the show
I Also made some assumptions about the prop department where the prop would have been designed. Tools used to create the prop would be standard sizes you'd find in a shop, so if a hole was drilled out, likely it would be of a common drill bit size. I also assumed that it was likely made in the US or by a US affiliated agency so the measurements would be in imperial in most cases. And whee possible they would use off the shelf parts. Based on these assumptions, I estimated the glass tube was likely a 2.5" glass candle cover such as this so from there, I could build a 3D model that was roughly accurate to scale and size.
Initial Design Testing
To begin the design process, first I took a few of the images I found and adjusted them in Adobe Illustrator to be actual size. Determining the size was a little tricky but I made a few assumptions:
- Holes were likely drilled/punched using a standard drill bit size. Likely imperial measurements so they would be something like 1/8", 1/4", 1/2" etc.
- The size needed to generally fit the prop usage in the show
- Likely the prop was not 100% custom made. For example, the wire, screws, and glass tube were likely obtained off the self (though I wouldn't be surprised if more of the prop was actually created with some sore of existing cans, etc.
Base on these assumptions, I settled on the red buttons being a 1/2" in diameter, the hew both being 1/8" and the glass tube being 2.5" diameter. The photos below are obviously at a perspective relative to the camera so measuring the image is not always accurate but sticking to the imperial measurements it worked out well. At this scale, most of the trim, indents and parts fit general imperial measurements of 1/32", 1/16", 1/8" etc. If I ever have the chance to see the prop up close I'll definitely check these measurements.
With some rough measurements run minds, it was a matter of starting to model the prop. I currently use Autodesk Fusion 360 to do my modeling. It took several hours but I was able to create the majority of the pieces in a rough configuration.
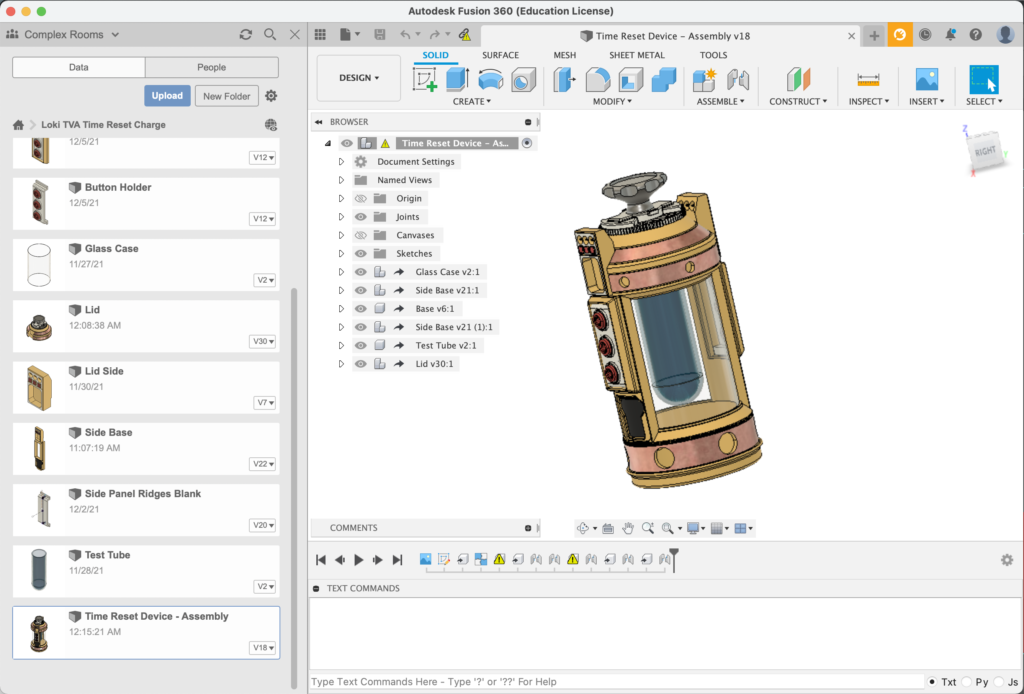
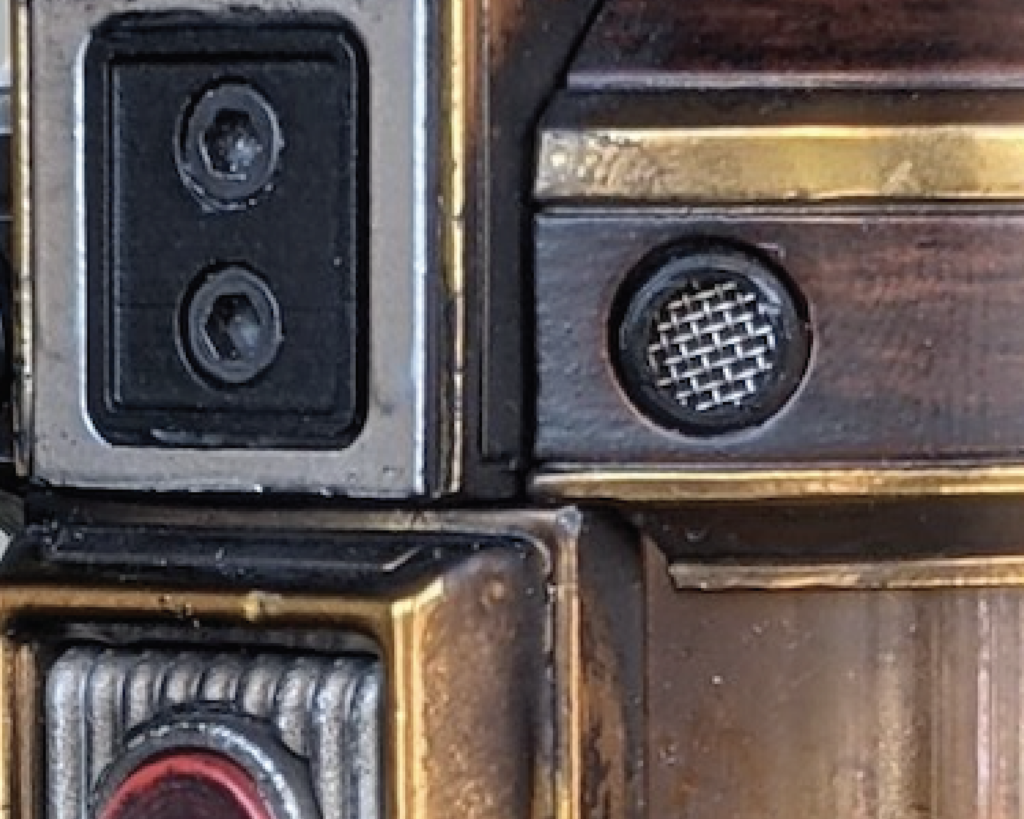
I plan to print this in a 3D printer using FDM and PLA. As such, the exact construction of the pieces differs slightly from the prop. If you closely inspect the image you can see how the pieces are assembled with each other:
In many cases I re-created the individual pieces but when printing, I plan to print multiple pieces as a single unit such as this side piece:
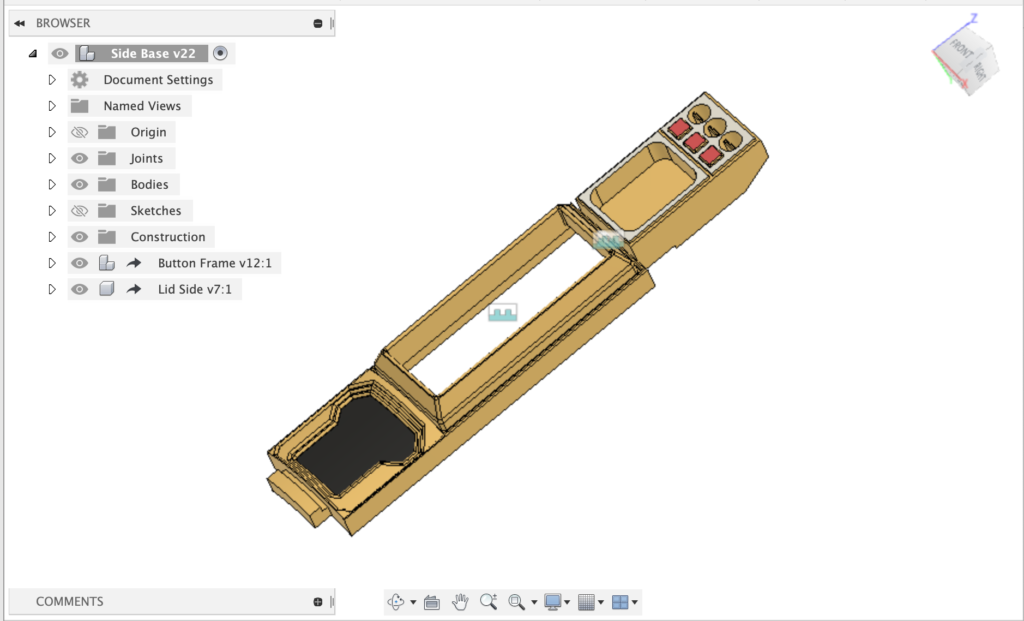
Additionally, I plan on making the prop functional so I had to account for some of the electronics, wiring and access for that. The side piece above has a large hole that will be filled with the button holder but will be accessible via the rear of the piece (though it will have a cover).
Next up is to print some test pieces on my Anycubic S and see how well it fairs for detail and fit where pieces need to be assembled. Likely some adjustments will need to be made as I didn't take all this into account during the initial design.